
How to Put QR Code Instructions on Gym Equipment
A real walkthrough of adding FreeQR Equipment Instructions to a gym machine — building the how-to-use steps, attaching a video and safety notes, printing the QR, and what a member actually sees when they scan it.
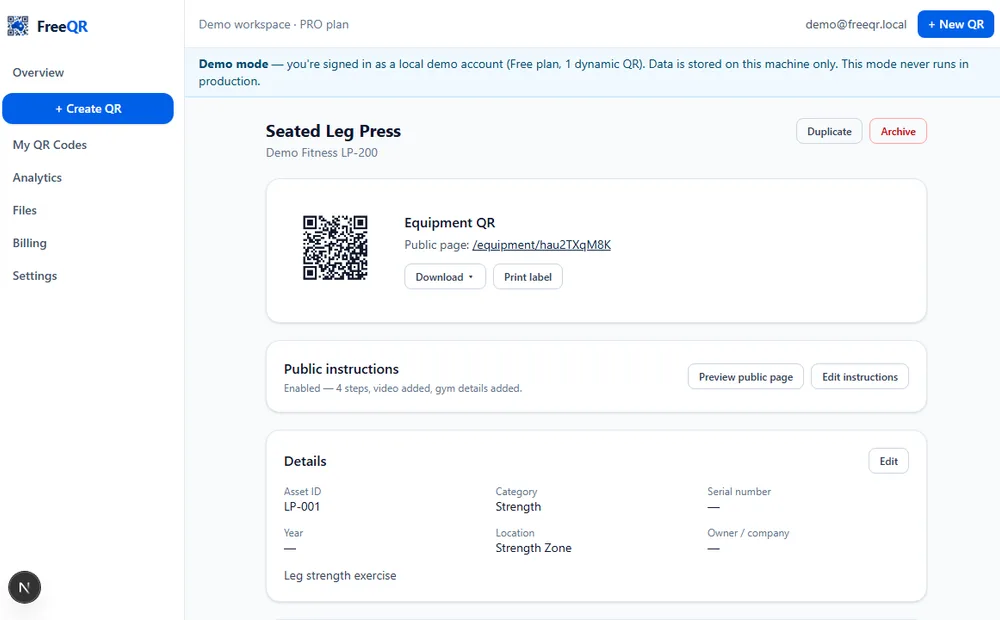
A new member looks at a leg press machine, isn't sure how the seat adjusts or where their feet go, and either guesses, waits for staff, or skips it. A QR code fixed to the machine can solve that instantly — scan it, and the correct setup, safety notes and a demonstration video are right there on their phone.
FreeQR Equipment Instructions adds exactly that to the Equipment Passport you may already be using for service and maintenance tracking — the same QR code, with a public instructions layer on top. This guide walks through building one for real, using a fictional demo machine (a Seated Leg Press), with genuine FreeQR screenshots throughout.
Not manufacturer-certified instructions
What you end up with
One QR code, printed and attached to the machine. A member scans it with their phone's camera — no app, no login — and sees, in order: the equipment name and a short description, how to use it, setup, an instructional video, safety notes, common mistakes, muscles targeted, and a button to report a fault. Staff see the same record from the dashboard, plus service dates, maintenance history and scan counts.
Setting it up, step by step
Add the equipment
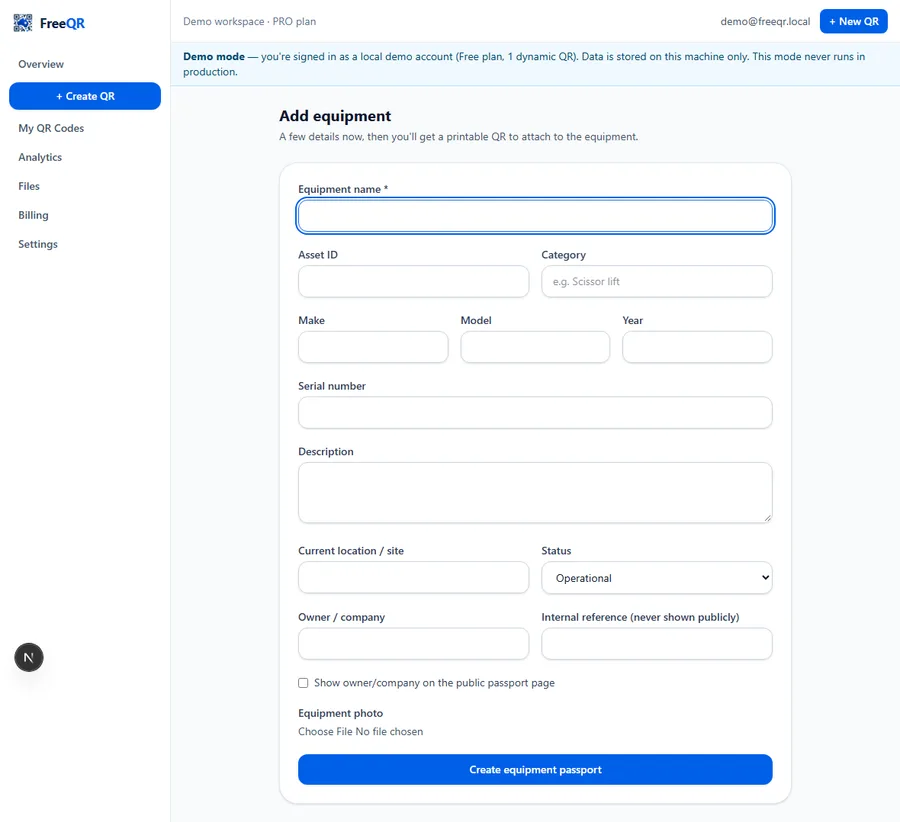
From Equipment in your FreeQR dashboard, click Add equipment. For this example: name “Seated Leg Press”, asset ID “LP-001”, category “Strength”, make “Demo Fitness”, model “LP-200”, location “Strength Zone”, and a short description, “Leg strength exercise.” None of this is required beyond a name — FreeQR generates the QR code as soon as you save.
Open the instructions editor and load a starter template
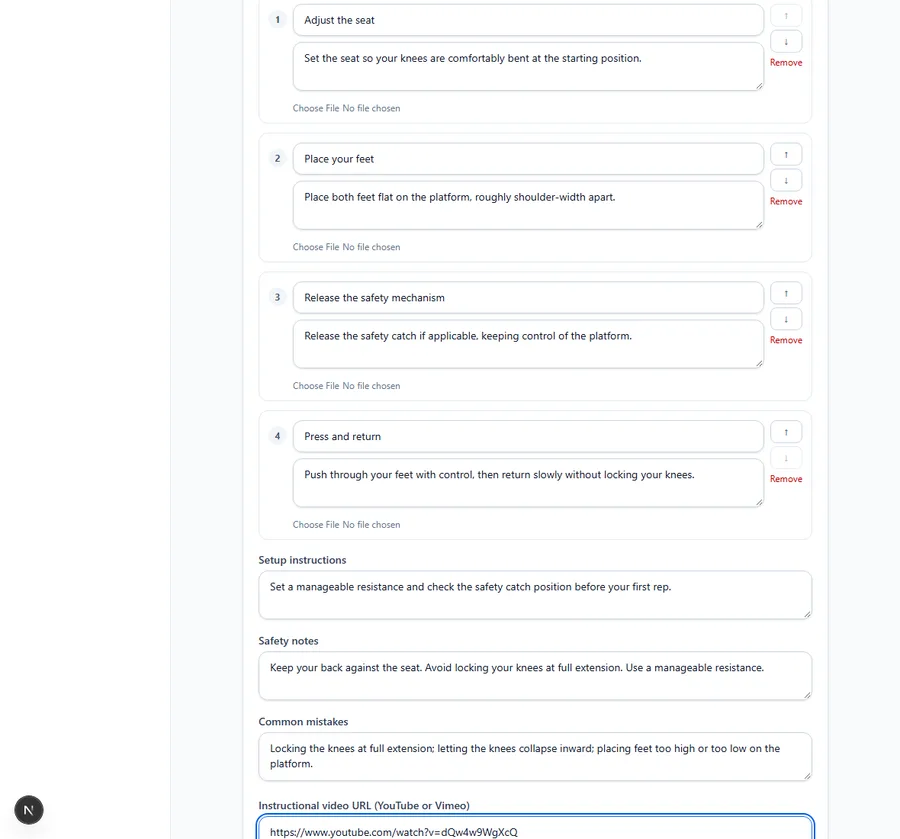
On the new equipment's detail page, click Edit instructions, then switch on Show instructions on the public page. For a common machine type, the starter template dropdown can pre-fill a draft: picking “Leg press” and clicking Load starter content fills in how-to-use steps, setup instructions, safety notes, common mistakes and the gym-specific muscle fields — all editable, and none of it published until you save.
From there, add an instructional video link (YouTube or Vimeo) and adjust any step's title, text or order — steps can be reordered with the up/down controls, no drag-and-drop required.
Save, then print or attach the QR code
Click Save instructions. The equipment detail page now shows a summary — in this example, “Enabled — 4 steps, video added, gym details added” — and the existing QR code from step 1 keeps working exactly as before. Download it as a PNG or SVG, or print a label, and attach it to the physical machine.
What a member actually sees
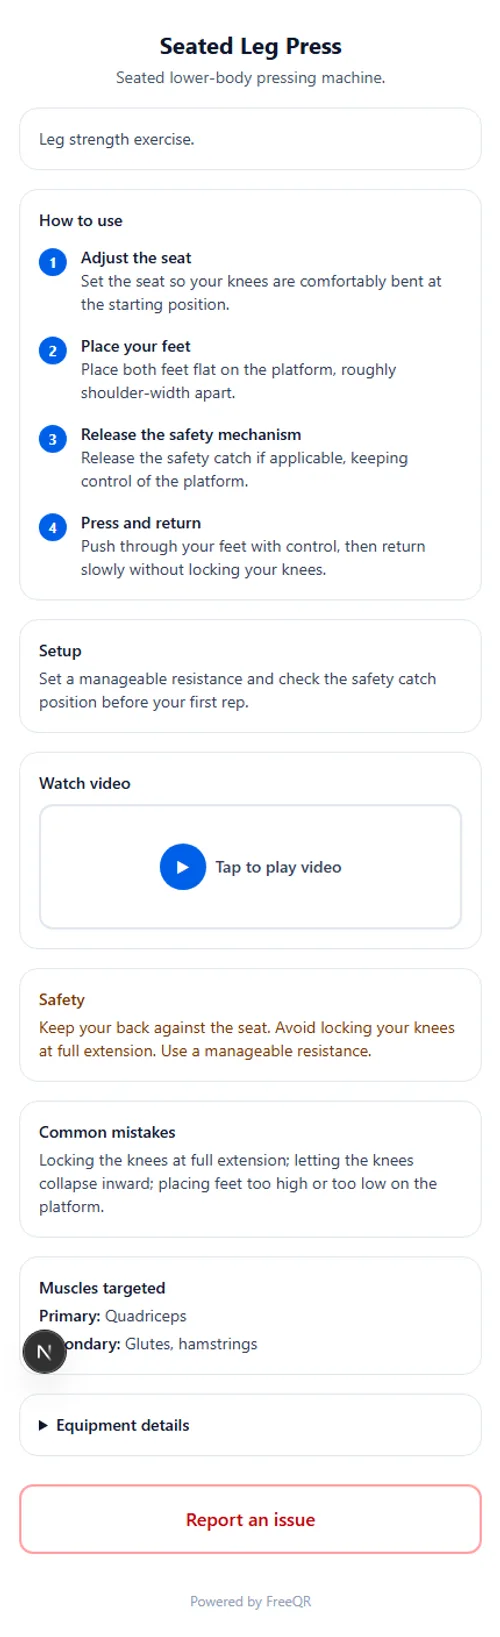
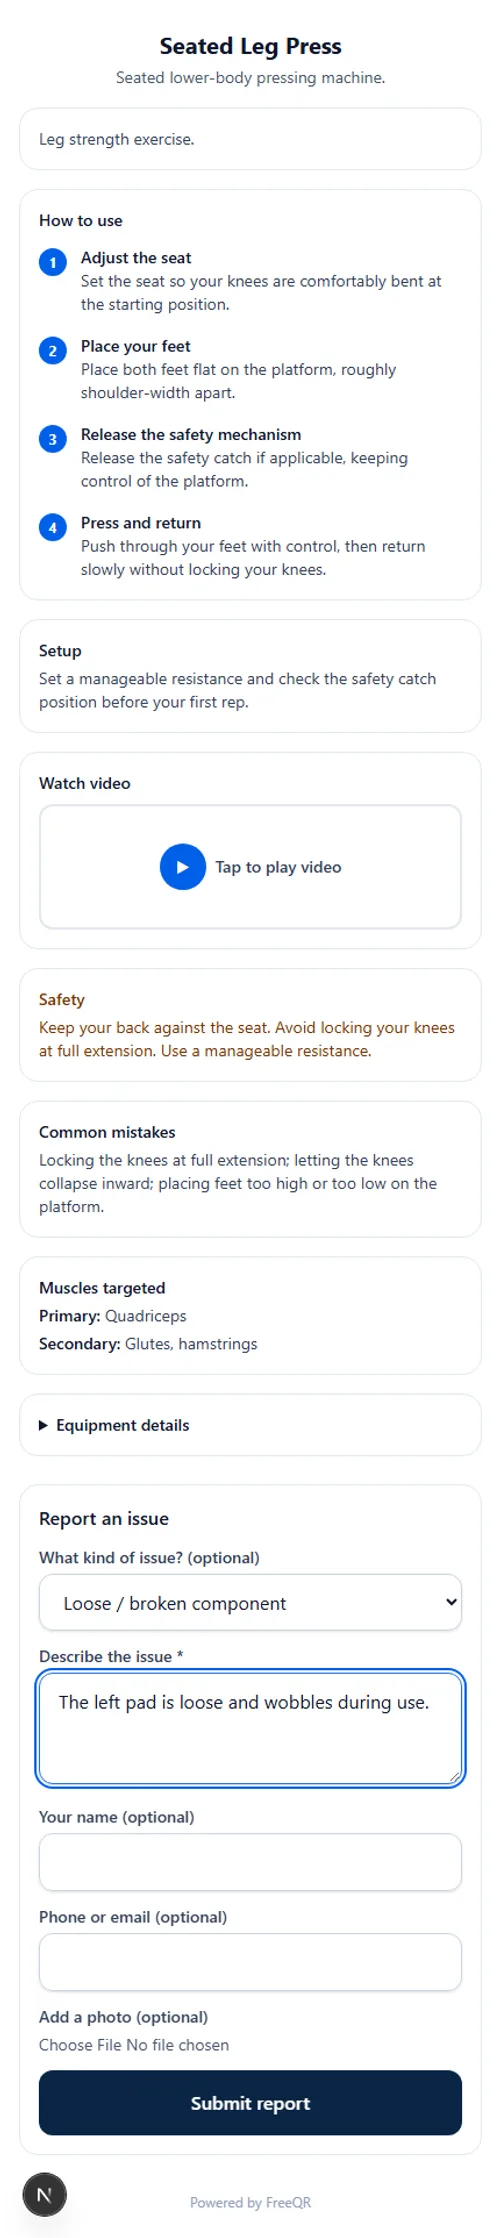
Scanning the QR opens the public instructions page directly in the phone's browser — the most useful information first: the equipment name, a short description, numbered how-to-use steps, setup guidance, a tap-to-play video (it never autoplays or preloads), safety notes, common mistakes and muscles targeted. A Report an issue button sits near the bottom for anything that looks wrong with the machine.
Reporting a fault, from the same scan
If a member notices something wrong, tapping Report an issue on the same public page opens a short form: an optional issue type (equipment damaged, not working, loose/broken component, cleanliness, safety concern, or other), a required description, and optional contact details and a photo. No account is needed, and the report lands directly in your dashboard against that exact machine.
The QR code never changes
This is the core promise of the feature: the sticker on the machine encodes a short FreeQR redirect link, not the instructions content itself. Fix a typo, swap the video, tighten up a safety note after an incident, or rewrite the whole thing — the physical QR code on the equipment never needs to be reprinted or replaced. Editing the instructions and scanning the same QR again immediately shows the updated content.
One record, not a second system
Equipment Instructions is a view on top of the same Equipment Passport record you'd use for service and maintenance tracking — not a separate, disconnected product. The same machine keeps its status, service and inspection dates, maintenance history, documents and scan analytics alongside its public instructions. Scan counts measure instruction page views, not verified machine usage.
Setting up a whole gym floor
For many machines at once, use Import Equipment to bulk-create from a CSV — equipment name, manufacturer, model, asset ID, category, location and an optional video link, each becoming its own equipment record and QR code. Instruction content itself isn't set from the CSV; add it per machine afterward, and the starter templates make that faster for common equipment types. Already set up one of a duplicate machine? Duplicate copies the instructions, video, safety information and make/model — but always issues a new QR code and asset record, and never copies the serial number, fault history or scan history from the original.
Pricing
Equipment Instructions is included wherever Equipment Passports are — FreeQR Pro (A$12.99/month) and above, not a separate subscription. See current pricing for the full plan comparison, or read the Gym Equipment QR Codes overview for the full feature list, including starter templates for 15 common machine types.
Frequently asked questions
- Does a member need an app to see the instructions?
- No. Scanning the QR opens the instructions in the phone's normal camera/browser flow — nothing to install, no account required.
- If I edit the instructions later, do I need to print a new QR code?
- No — that's the core of how it works. The printed QR encodes a short FreeQR link, not the instructions themselves, so editing content in your dashboard updates what members see immediately on the same sticker.
- Where do the starter templates come from, and are they safe to publish as-is?
- They're generic starting content for common machine types (leg press, treadmill, cable machine and others), clearly labelled as a draft. Always review and customise them against your specific equipment's manufacturer instructions and your gym's own safety policy before relying on them.
- What counts as a "scan" in the analytics?
- A scan means someone opened the instructions page from the QR — it measures instruction page views, not verified machine usage. FreeQR never labels this as equipment usage.
- Can members report a fault without an account?
- Yes, if you've enabled it for that machine. They choose an issue type (damaged, not working, loose/broken component, cleanliness, safety concern, or other), add an optional description and photo, and it lands in your dashboard — the same fault-reporting flow as FreeQR Equipment Passports generally.
- Which plan do I need?
- Equipment Instructions is included wherever Equipment Passports are — FreeQR Pro (A$12.99/month) and above, not a separate add-on.