
Printing QR Codes That Actually Scan: A Checklist for Signs, Labels and Packaging
A QR code that scans perfectly on screen can still fail on a sticker, a label or a shopfront window. The causes are almost always physical and almost always predictable — here's each one, how to test for it, and a checklist to run before you approve a print run.
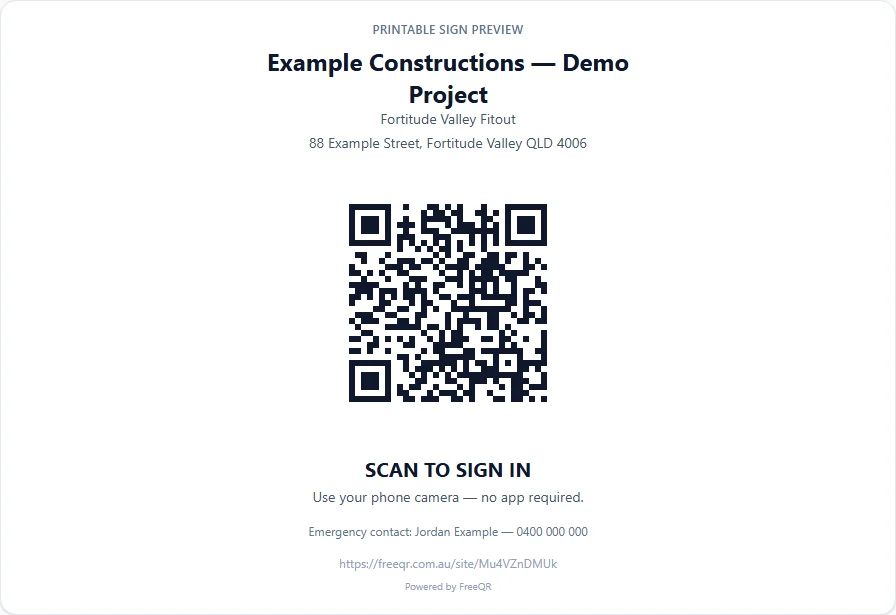
Almost every printed QR code that fails to scan fails for one of a short list of physical reasons: not enough blank space around it, not enough contrast, a reflective or curved surface, a logo covering too much of the pattern, artwork enlarged past its resolution, or a code printed too small for the distance it's read from. None of them are mysterious, and all of them can be caught before the run — if you test a real sample rather than trusting the screen.
One piece of background makes the rest easier to reason about. A QR code's grid size is set by how much data it holds: the QR Code standard (ISO/IEC 18004) defines 40 versions, from 21×21 modules up to 177×177. More data means more, smaller modules at the same printed width — and smaller modules have less tolerance for blur, ink spread, scuffs and glare. QR codes also carry Reed-Solomon error correction, which is why a slightly damaged code often still works. That budget is finite, though, and a logo spends some of it.
1. Leave the quiet zone alone
The quiet zone is the blank margin around the code. Scanners use it to find where the symbol starts and ends, so it's part of the code, not decoration. Crowding it is one of the most common layout mistakes.
- Keep a genuinely blank margin on all four sides. The downloaded artwork already includes one — don't crop it off in layout.
- Don't run a border rule, box, price or cut line through the margin.
- On a photo or coloured panel, put the code on a solid light patch rather than letting imagery run underneath it.
- Watch folds, die lines and bleed. A code that straddles a crease or a label edge loses part of its pattern.
2. Contrast beats branding
Scanners read dark against light. The safest printed QR code is still near-black modules on a white or very light background. Trouble starts when the code is tinted to match a brand palette, printed light-on-dark (inverted codes are read by some scanning apps and not others), or placed over an image busy enough that the modules stop standing out.
FreeQR's designer checks the contrast between your background and the code, eye and gradient colours, and warns — “This colour combination may be difficult to scan” — when the ratio drops below 2.5:1. It also test-decodes the rendered design and flags it if the decode fails. Treat both as a floor, not a pass mark: they can't know what stock the code will be printed on or what light it'll be read in, and neither check specifically warns about inverted (light-on-dark) colours.
3. Gloss, curves and texture
The surface matters as much as the artwork.
- Gloss, laminate and varnish reflect light into the lens, and a glare patch over the pattern reads as missing data. Ask for a matte or satin area over the code; where that's not possible, test real samples under the real lighting from more than one angle.
- Curved surfaces — bottles, cans, tubes, cups — distort the grid. The tighter the curve relative to the code's width, the worse it gets. Keep the whole pattern visible from one viewpoint and never wrap it around an edge.
- Textured and absorbent materials — kraft board, fabric, timber — let ink spread until neighbouring modules merge. Print larger than you would on coated stock, and keep the encoded data short so the code has fewer, chunkier modules.
4. Logos sit on borrowed space
A centred logo works because error correction reconstructs the modules it hides. FreeQR handles the part you can't see: a code with a logo is generated at error-correction level H (the highest, recovering roughly 30% of the symbol), and one without at level Q. The part you control is size and placement — the logo slider runs from 15% to 40% of the code, and the smaller end is the safer end. Never let a logo touch the three large corner squares, which scanners use to locate and orient the code. Printing slightly thickens modules, so a logo that's fine in the preview can tip a code over the edge on paper; if you add one, the sample test below stops being optional.
5. Export the right file
Send vector artwork whenever the printer accepts it. FreeQR's SVG export draws the code (and any frame) as vector shapes, so one file is equally correct on a 20 mm label and a 2 m banner. If you've uploaded a logo, that logo is embedded inside the SVG as a bitmap image — the code stays perfectly sharp, but for very large prints start from a high-resolution logo.
PNG export comes in 1024, 2048 and 4096 px. That covers most jobs, but a PNG has a fixed pixel grid. Commercial print is normally specified at 300 DPI, and anything under about 150 DPI looks visibly soft even off an office printer. FreeQR does the arithmetic for you: under the download button, the print-size check (“Printing it a different size? Check it here”) takes a preset — business card, sticker, product label, flyer, poster, shopfront window, banner — or any width in millimetres, and reports the output DPI, the printed width of the code itself, and how far away it should scan from. It offers a one-click switch to the smallest PNG option that reaches 300 DPI at that size, and suggests the SVG when even the largest PNG won't.
Open the file before you send it
6. Size: what it actually depends on
There is no universal correct size for a printed QR code, and a single number quoted without context is a guess. Printed size depends on several things at once:
- How much data the code holds — a long URL needs a higher version, so more and smaller modules at the same width.
- Viewing distance — the common field rule of thumb is that a code reads reliably from about 10× its own width. It's guidance, not a specification, but it scales sensibly: a 30 mm sticker suits arm's length; a 250 mm window decal suits the footpath.
- Print method — digital, offset, flexo, screen, thermal transfer and laser etch all reproduce fine detail differently.
- The surface — coated, uncoated, textured, curved or glossy, as above.
- The camera — your customers' phones are, on average, older than yours.
- The environment — light level, glare, and whether the person is standing still or walking past.
What FreeQR will tell you concretely is when a code is heading for trouble: it warns when the scannable code itself — margin and frame excluded — would print under 15 mm across, because below that most phone cameras struggle whatever else you do. The bulk label designer applies the same 15 mm threshold to label sheets. Use those as boundaries, then confirm with a real sample.
7. Test a real sample, not a mock-up
This is the step that prevents expensive mistakes, and the one most often skipped because the design looked right on a monitor.
Print one at final size, on the real material
Same stock, same finish, same printer if possible. Office paper tells you very little about a laminated label or a textured carton.
Scan it on several different phones
Include at least one older device and more than one camera or scanning app. A code that works on one phone and not another isn't finished.
Scan it at the real distance, in the real light
Outdoor signage outdoors, in daylight and at dusk. A business card in the hand. A code for a dim venue in a dim room.
Scan it on the curve and through the glare
If it's going on a bottle, wrap the sample around a bottle. If it'll sit behind glass or under gloss, reproduce that and move around to find where the glare lands.
Try it slightly damaged
Scuff a sample or cover a small part of it. If a tiny mark kills the scan, the code is too small or carrying too much data for the material.
8. Check where it actually goes
A code can be technically perfect and still be wrong. Before approving a run, scan the final artwork on a phone, on mobile data rather than office Wi-Fi, and look hard at what loads:
- Is it the right page, with the right language, prices and details?
- Does it read properly on a phone without pinch-zooming?
- Is it a permanent address, not a preview or staging link that will stop working?
- If it's a PDF, does it actually open on a phone?
9. Static or dynamic is a reprint decision
A static code has the destination encoded in the printed pattern: free, needs no account, depends on no service — and can never be changed, so if the destination is wrong or moves, every printed copy is wrong. A dynamic code encodes a short, permanent FreeQR link instead, and the destination behind it can be edited from the dashboard; copies already in the field follow the change immediately. The trade-off is that it depends on FreeQR continuing to resolve that link.
A dynamic code also helps the print itself: it only ever encodes a short link, however long the real destination is, which keeps the version low and the modules chunky. The practical test is the cost of being wrong — a flyer for next weekend is a fine static job; packaging, product labels, vehicle signage and equipment tags are where dynamic earns its keep. There's a fuller comparison in static vs dynamic QR codes.
Worked example: 2,000 product stickers
A small manufacturer is printing 2,000 stickers, each with a QR code that opens the installation manual. The sticker is 40 mm square, gloss laminated, on a flat plastic housing.
Static or dynamic?
Dynamic. The manual is a PDF that will be revised. With a static code, revision two means 2,000 wrong stickers, most already on products; with a dynamic code, the destination is re-pointed (or, for a PDF FreeQR hosts, the file is replaced) and every sticker follows. This is the single highest-value decision in the job.
Validate the export
Download the SVG and give the printer vector artwork. If they insist on raster, pick the Product label preset (40 mm) in the print-size check and use the PNG option it recommends for 300 DPI. Confirm the “Code itself” width it reports is comfortably over 15 mm — with a frame or wide margin, the code is noticeably narrower than the sticker.
Deal with the gloss before the run
Ask the printer for a matte or satin patch over the code. If that's not possible, get a laminated sample and scan it under workshop lighting and a bright lamp, at several angles.
Test a real sample, then check the destination
One finished sticker on the actual housing, scanned on four or five phones including an old one, at the distance an installer would hold it — then scuff a corner and scan again. Open the manual that loads: correct revision, readable on a phone, a permanent address.
Approve the run
The printed code is now a fixed asset and the destination is the changeable part. When revision two arrives, update it once — no reprint, no stickers to peel off.
The pre-print checklist
Run this before signing off any run. Anything you can't tick is the thing most likely to go wrong.
- The quiet zone is blank on all four sides — no rule, image, fold, die line or crop through it.
- Dark modules on a light background with real contrast — not a pale brand tint, not inverted unless tested widely.
- The surface is accounted for: matte over gloss where possible, curvature checked on a real sample, ink spread allowed for on absorbent stock.
- Any logo is small, centred and clear of the corner squares — and tested in print, not just in preview.
- SVG supplied where the printer accepts it; otherwise a PNG that reaches 300 DPI at the final printed size.
- The code itself is comfortably above 15 mm and sized for the real viewing distance.
- A sample at final size, on the real material, scans on several phones at the real distance and in the real light.
- A scuffed or partly covered sample still scans.
- The destination has been opened on a phone, on mobile data, and is correct and permanent.
- Static versus dynamic was decided deliberately, with the cost of a reprint in mind.
Printing a whole batch?
For many codes at once, the bulk QR code generator creates them from a spreadsheet and lays them out on A4 or US Letter label sheets (large, medium, compact or a custom grid), warning when a label would make the code too small. Designing and previewing a sheet is free; downloading it as a print-ready PDF needs FreeQR Starter or above. If the destinations might ever change, make them dynamic before the run rather than after — the dynamic QR guide shows editing a destination after printing, and your first dynamic QR is free.
Frequently asked questions
- How big does a printed QR code need to be?
- There's no single correct number — it depends on how much data the code holds, how far away people scan it from, the print method, the surface, the camera and the light. A widely used field rule of thumb is that a code reads reliably from about 10 times its own width, so a 30 mm sticker suits arm's length and a code read from across a car park needs to be hundreds of millimetres wide. As a floor, FreeQR warns when the code itself (not counting its margin or frame) would print under 15 mm across.
- Should I send my printer a PNG or an SVG?
- SVG, whenever the printer accepts it. FreeQR's SVG export draws the code as vector shapes, so it stays sharp at any printed size. A PNG is a fixed grid of pixels — FreeQR offers 1024, 2048 and 4096 px — and enlarging it past what that resolution supports softens the module edges. One caveat: if you've added an uploaded logo, the logo itself is embedded in the SVG as a bitmap image, so very large prints should use a high-resolution logo file.
- Can I put my logo in the middle of a QR code?
- Usually, yes. It works because QR codes carry error correction, not because the centre is spare space. FreeQR automatically generates codes with a logo at the highest error-correction level (H) and lets you size the logo between 15% and 40% of the code. Keep it at the smaller end, keep it clear of the three corner squares, and test the printed result — not just the on-screen preview.
- Why does a QR code scan on my phone but not a customer's?
- Cameras, autofocus behaviour and scanning apps vary, and so does the light the code is read in. A code that only just works on a newer phone in office light can fail on an older phone in a dim venue. Test a printed sample on several phones, at the real distance, in the real lighting.
- Does a glossy finish stop a QR code from scanning?
- Not outright, but it can make it unreliable. Gloss, laminate and varnish reflect light back into the camera, and a glare patch across part of the pattern reads as missing data. A matte or satin area over the code is the simplest fix; otherwise, test a finished sample under the real lighting from a few angles.
- Will FreeQR stop me downloading a code that's too small or low-resolution?
- No. The print-size check is advice only — it tells you when the code would print under 15 mm or below 300 DPI and suggests a better option, but you can always download anyway.